Charting the Tides of War: A Comprehensive Look at the Battle of Jutland
Related Articles: Charting the Tides of War: A Comprehensive Look at the Battle of Jutland
Introduction
With enthusiasm, let’s navigate through the intriguing topic related to Charting the Tides of War: A Comprehensive Look at the Battle of Jutland. Let’s weave interesting information and offer fresh perspectives to the readers.
Table of Content
Charting the Tides of War: A Comprehensive Look at the Battle of Jutland
The Battle of Jutland, fought in the North Sea on May 31-June 1, 1916, remains one of the largest and most consequential naval battles in history. This clash between the British Grand Fleet and the German High Seas Fleet, while ultimately a tactical victory for the British, had profound implications for the course of World War I. Understanding the battle’s strategic context and the complex interplay of forces requires a thorough examination of the battleground itself.
The Geographical Setting: A Stage for Naval Power
The North Sea, a shallow and relatively enclosed body of water, provided the backdrop for this epic struggle. Its strategic importance was undeniable, as it served as a crucial waterway for trade and naval movement between Germany and its overseas colonies. The battle unfolded across a vast expanse of the North Sea, stretching from the Skagerrak in the north to Dogger Bank in the south. This geographically diverse area, characterized by shifting currents, fog banks, and unpredictable weather, presented significant challenges to both sides.
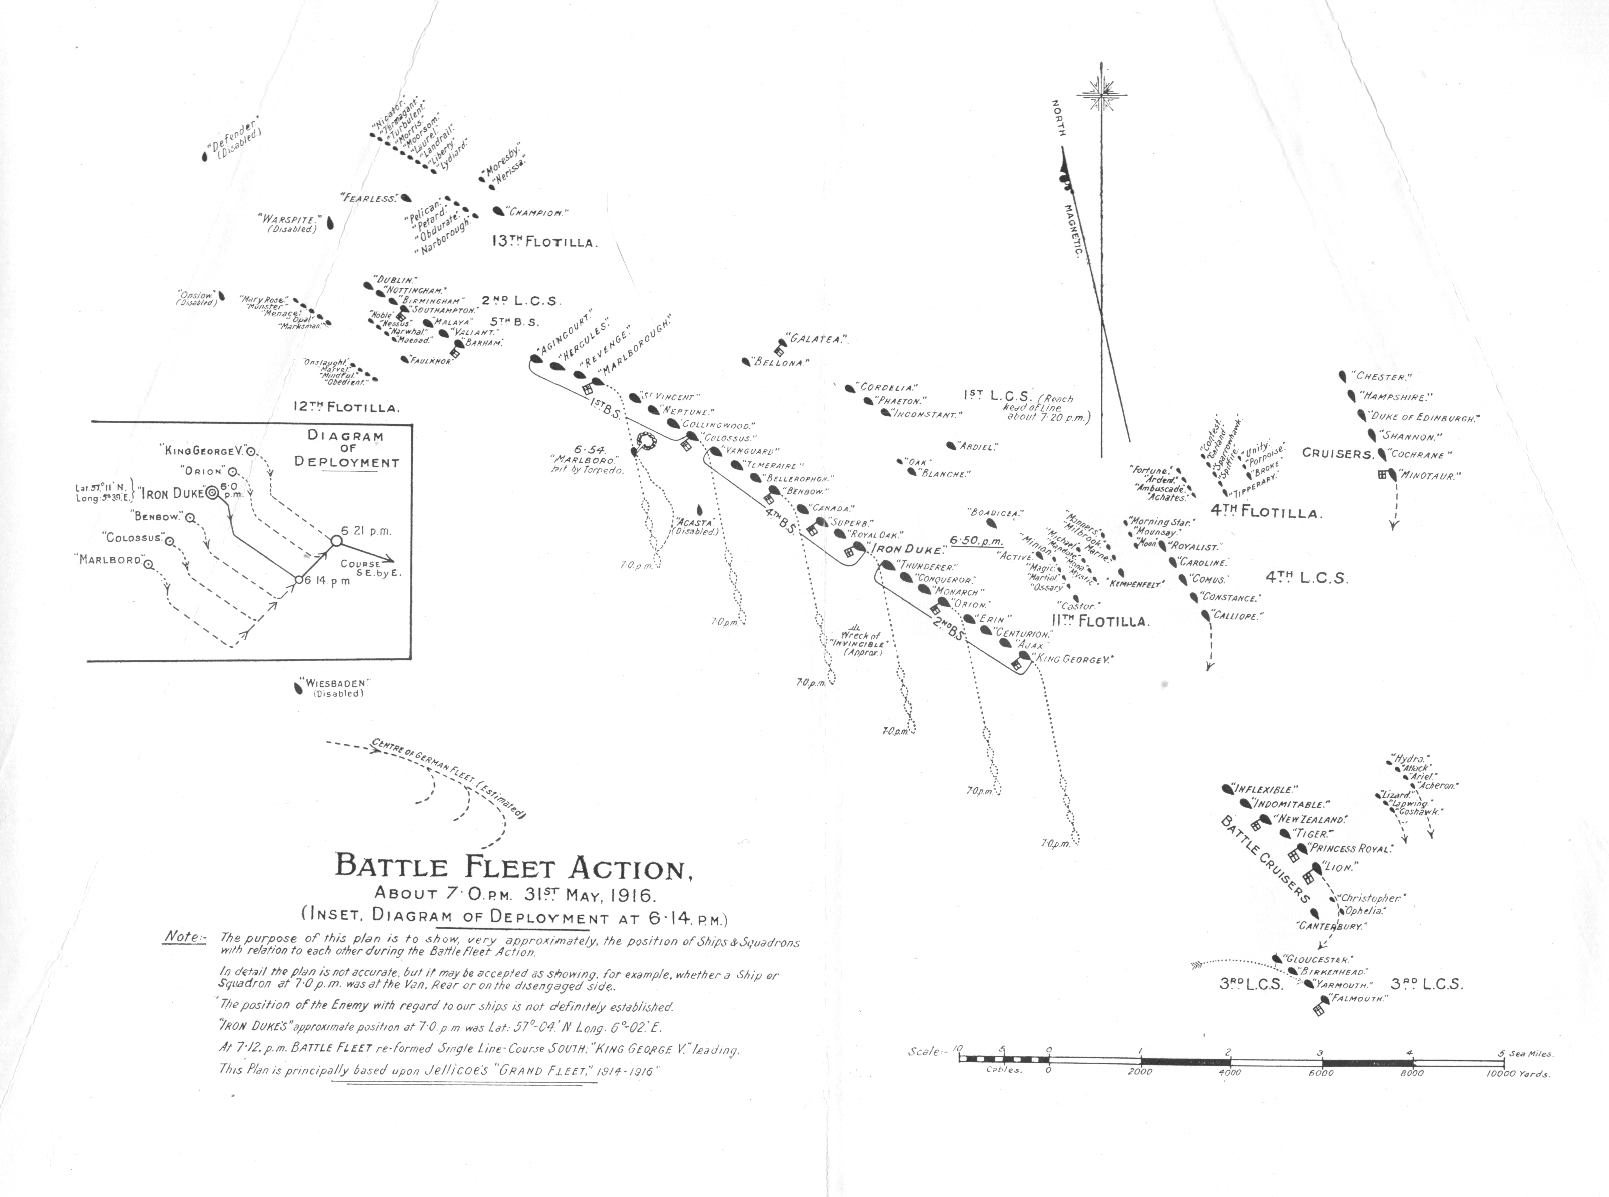
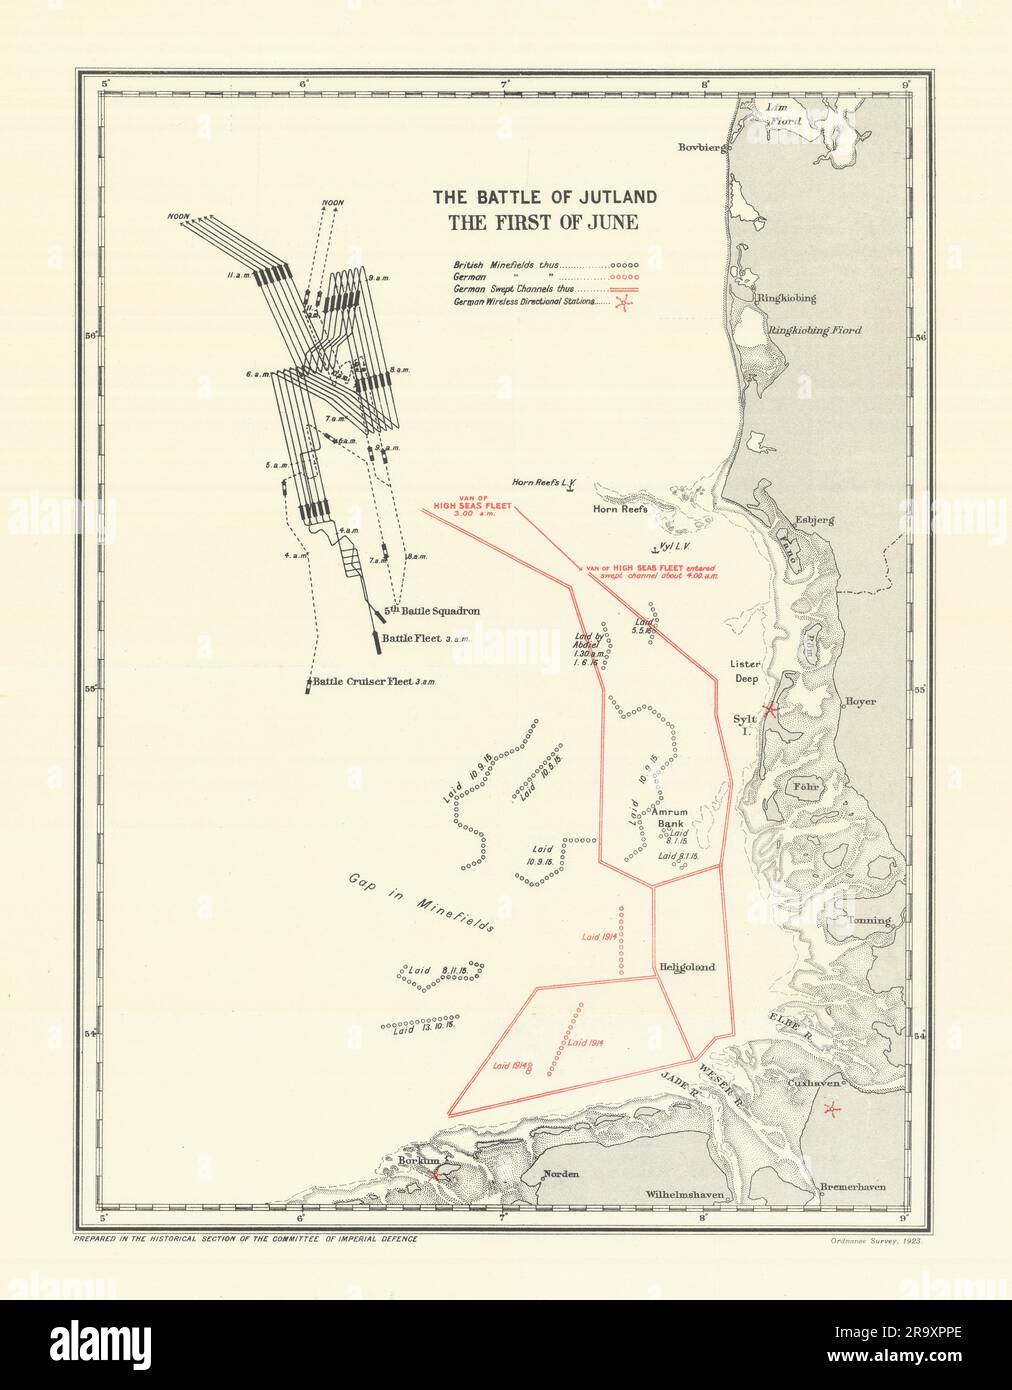
A Map Unveils the Narrative
A map of the Battle of Jutland becomes an indispensable tool for unraveling the complex movements and engagements of the opposing fleets. It provides a visual representation of the unfolding drama, highlighting the key locations, tactical maneuvers, and pivotal moments that shaped the battle’s outcome.
Key Features of the Battle Map:
- Skagerrak: This narrow strait, connecting the North Sea to the Baltic Sea, served as the initial meeting point for the German High Seas Fleet. The German fleet, under Admiral Reinhard Scheer, sought to lure the British Grand Fleet into a decisive engagement in this constricted space.
- Dogger Bank: This shallow sandbank, located approximately 100 miles east of the English coast, marked the southernmost point of the battle. The British Grand Fleet, led by Admiral John Jellicoe, aimed to trap the German fleet in this area, where their superior firepower could be brought to bear.
- The "Race to the North": The initial phase of the battle involved a rapid pursuit by the British fleet of the retreating German fleet. This "race to the north" was characterized by intense artillery exchanges and the deployment of battlecruisers, which, due to their speed and firepower, played a crucial role in the early stages.
- The "Battle of the Bight": This key engagement, occurring off the coast of Jutland, saw the German fleet attempting to turn and engage the British fleet in a decisive battle. The British, however, maintained a tactical advantage, exploiting their superior numbers and firepower.
- The "Run to the South": As the battle progressed, the German fleet, facing heavy losses and a deteriorating tactical position, retreated southwards. The British pursued relentlessly, seeking to inflict further damage and ultimately force a decisive victory.
The Map as a Tool for Understanding:
- Strategic Context: The map provides a visual understanding of the battle’s strategic context, revealing the geographical constraints and opportunities that shaped the actions of both sides.
- Fleet Movements: The map illustrates the complex movements of the opposing fleets, highlighting their formations, tactical maneuvers, and the changing dynamics of the battle.
- Key Engagements: The map identifies the locations of key engagements, such as the "Battle of the Bight" and the "Race to the North," showcasing the intensity and ferocity of the fighting.
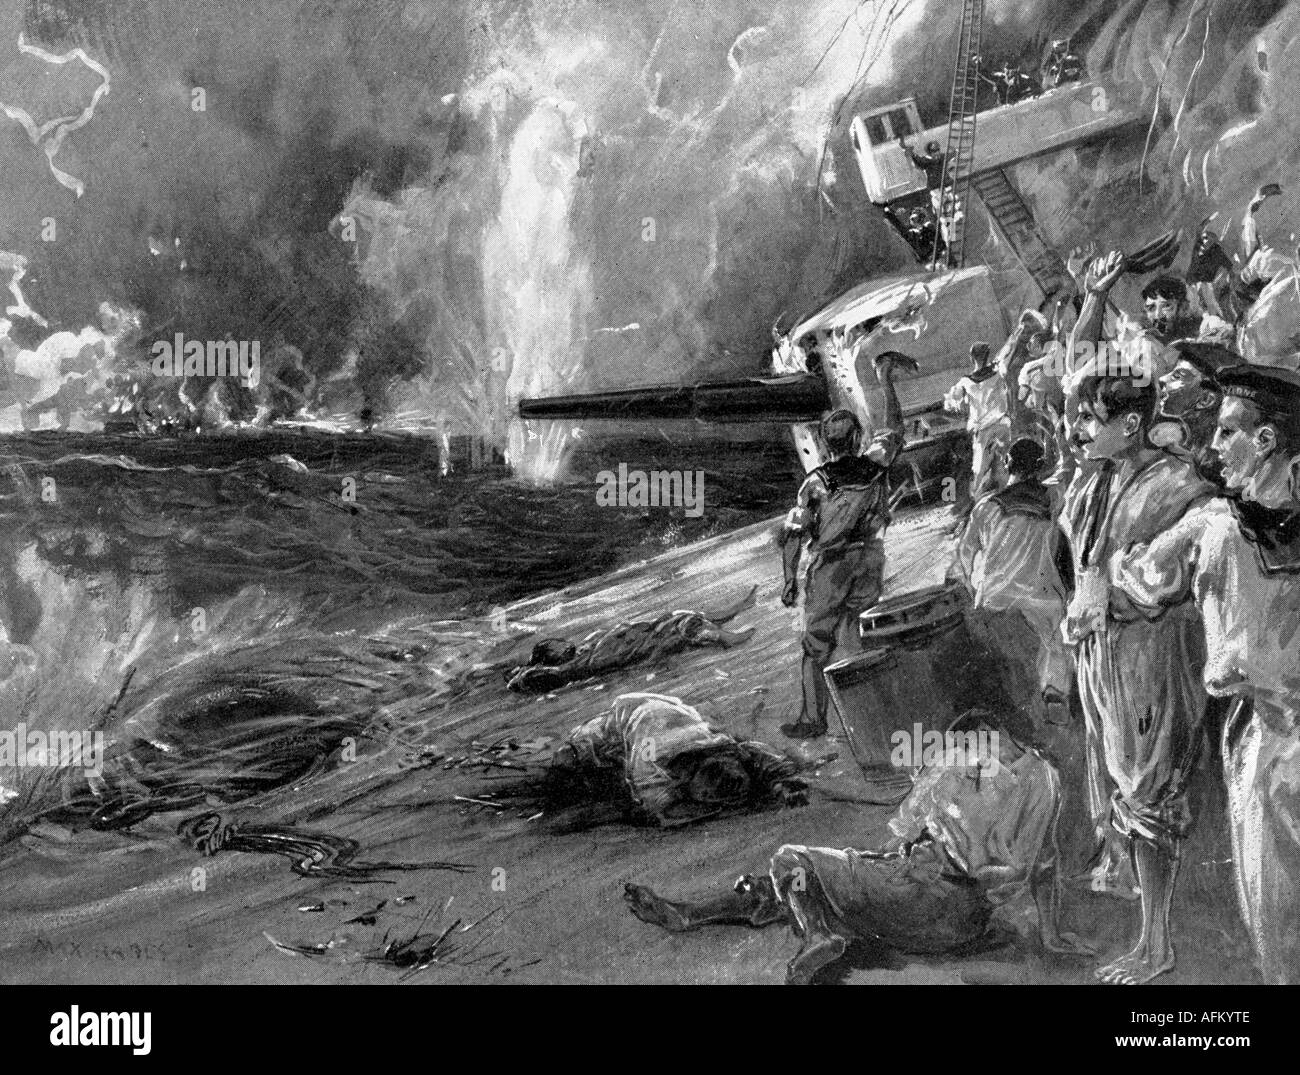
- Losses and Casualties: The map can be annotated to indicate the locations of ship losses and casualties, providing a sobering reminder of the human cost of this naval battle.
Beyond the Tactical: The Importance of the Battle of Jutland
While the Battle of Jutland did not produce a decisive victory for either side, it had significant implications for the course of World War I.
- Strategic stalemate: The battle cemented a strategic stalemate in the North Sea, preventing either side from achieving a decisive naval victory. This stalemate, in turn, influenced the course of the war, limiting the ability of the German navy to effectively challenge British dominance at sea.
- Impact on morale: The battle had a profound impact on morale on both sides. The British, despite their tactical victory, suffered heavy losses, leading to a sense of disappointment and frustration. The Germans, while forced to retreat, managed to inflict significant damage on the British fleet, boosting their morale and demonstrating their naval capabilities.
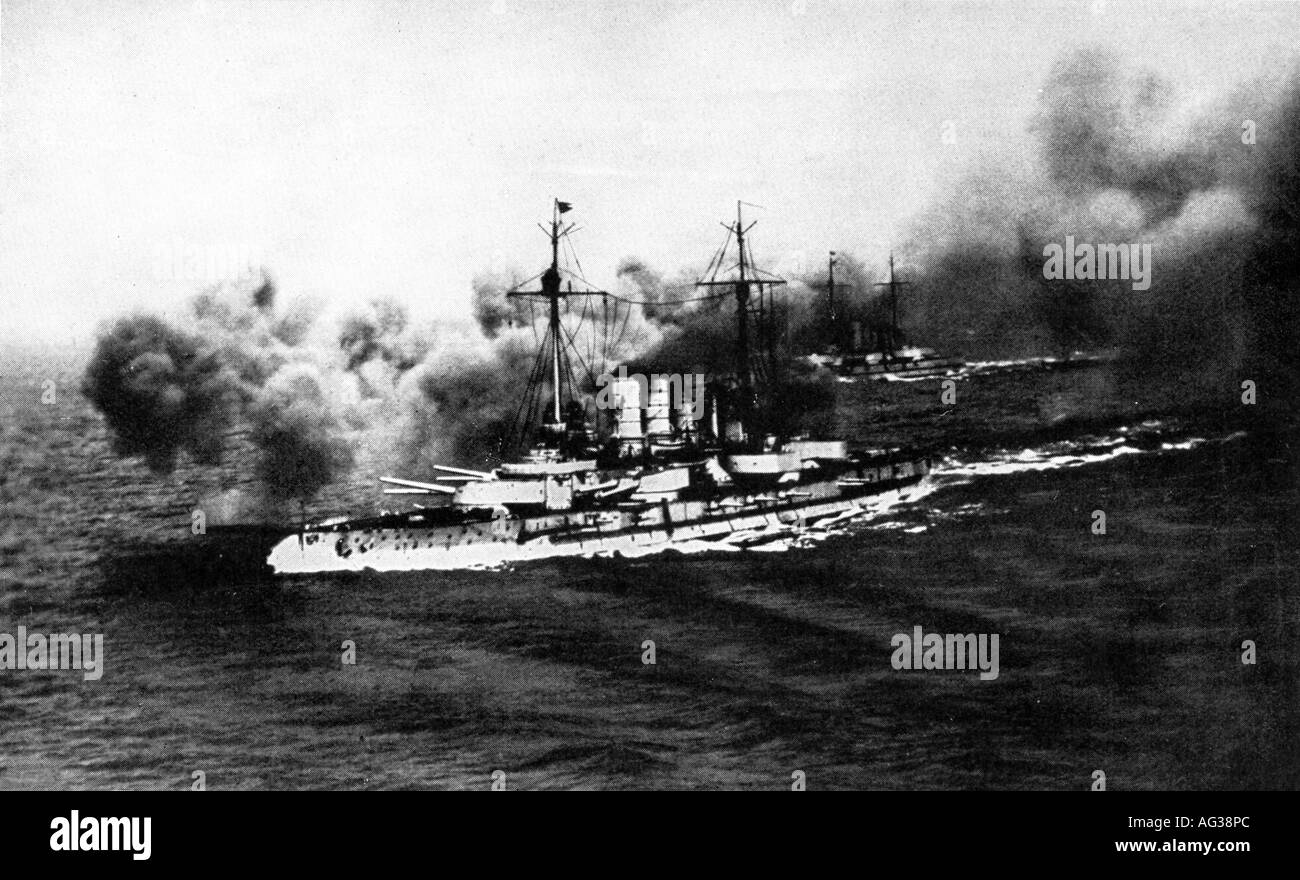
- Technological advancements: The battle highlighted the importance of technological advancements in naval warfare. The use of battlecruisers, dreadnought battleships, and advanced artillery systems transformed naval combat, emphasizing the need for constant innovation and adaptation.
FAQs about the Battle of Jutland Map
-
Q: What is the significance of the Skagerrak in the Battle of Jutland?
- A: The Skagerrak served as the initial meeting point for the German fleet, providing them with an opportunity to lure the British fleet into a narrow and potentially advantageous position.
-
Q: How did the map of the Battle of Jutland influence the battle’s outcome?
- A: The map provided a visual representation of the battleground, allowing commanders to assess their positions, plan their movements, and make informed tactical decisions.
-
Q: Why is the "Battle of the Bight" considered a key engagement in the Battle of Jutland?
- A: The "Battle of the Bight" saw the German fleet attempt to turn and engage the British fleet in a decisive battle. This engagement was characterized by intense artillery exchanges and a fierce struggle for control of the sea.
Tips for Understanding the Battle of Jutland Map
- Study the geographical features: Familiarize yourself with the key geographical features, such as the Skagerrak, Dogger Bank, and the surrounding coastline, to understand the constraints and opportunities of the battleground.
- Focus on the fleet movements: Pay attention to the movements of the opposing fleets, their formations, and the changes in their tactical positions throughout the battle.
- Identify the key engagements: Locate the locations of key engagements, such as the "Battle of the Bight," and examine the strategies and tactics employed by both sides.
- Consider the losses and casualties: Analyze the locations of ship losses and casualties to understand the human cost of the battle and the impact on both sides.
Conclusion
The Battle of Jutland, a clash of titans in the North Sea, remains a pivotal event in naval history. Its complex strategic context, the intricate movements of the opposing fleets, and the sheer scale of the engagement are all vividly depicted on a map of the battle. By understanding the geographical setting, the key engagements, and the strategic implications of this epic struggle, we gain a deeper appreciation for the importance of this pivotal naval battle and its lasting impact on the course of World War I.


Closure
Thus, we hope this article has provided valuable insights into Charting the Tides of War: A Comprehensive Look at the Battle of Jutland. We thank you for taking the time to read this article. See you in our next article!